Can the Teensy Turn Itself Off?

Status
Not open for further replies.

LC475

Member
Hi there!

I am working on a project for which I want a low-voltage cut-off to protect the battery pack. It's a power tool running off of a 12V battery pack. The Teensy is running behind a 5V voltage regulator.

So, as it is right now, the tool will run until the battery pack voltage drops down around 5 volts, then the voltage regulator stops working and the Teeny shuts off and shuts everything else down with it. That's no good, because the batteries should only be discharged down to a minimum of 9.54V (3.18V per cell).

Is there any way to programmatically shut down the Teensy? I can make a voltage divider, hook it to a pin, and then have X happen once it drops below a minimum. If the Teensy can shut itself off, then X can be "turn off the Teensy!". Perfect!

If not, what would you electronics wizards recommend as a cheap, simple low-voltage cut-off method? Does someone sell a simple PCB for battery protection that will perform low-voltage cut-off? Or for all I know it would be relatively simple to put one together myself using a few components, perhaps? I'm reading on Wikipedia about it and trying to learn, but it's new ground for me and I'm not seeing a simple solution. Maybe a MOSFET with a 12V gate threshold? But that would have a small current pull even after it shuts off everything behind it, right? If so, that would slowly drain the battery to zero if the battery is left plugged in by the user and wreck it even worse than the current set-up, which at least stops drawing after 5V.
 
i would wire up a p channel mosfet with a weak pullup resistor to b+, then a diode between the gate and and digital pin so when the pin is grounded the circuit turns on (just make sure to put it the correct way around or else b+ will go to the digital pin). wire a pushbutton switch to short the gate to ground to initially turn it on. when you want to turn it off, let the digital pin float and the mosfet will turn back off, cutting the voltage to the teensy,
 
forget that diode i said, tried it out and my line of thinking didn't make sense... use an npn or another n channel to switch that p-channel mosfet to ground.
 
Last edited:
forget that diode i said, tried it out and my line of thinking didn't make sense... use an npn or another n channel to switch that p-channel mosfet to ground.

aortiz557, thank you so much, but I think you are overestimating both my intelligence and my experience level! I don't even know what an npn transistor is, or does, other than I've seen them at Radio Shack. :) I also don't know what value would qualify as "weak" for a pull-up resistor, and a quick Google search seems to turn up the answer "it depends." What is the pull-up resistor for?
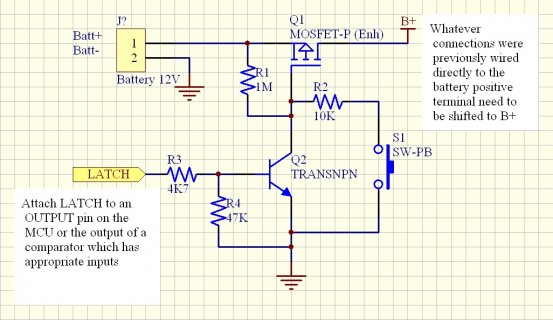
Are you saying the momentary switch should ground the data pin on the P-channel MOSFET just to get things rolling, then un-ground it and get out of the way, turning things over to some data pin on the Teensy which will keep it grounded, until I tell it not to (based on the status of the simple voltage sensor with a voltage divider I described earlier plugged into another Teensy data pin) at which point everything turns off until the user pushes the momentary switch again?
 
Not sure this vid is as helpful as I think it should be (am at work and watching vid is a lot more obvious than Googling crap and typing something into a page like they look on this forum) but have a squiz: https://www.youtube.com/watch?v=Foc9R0dC2iI

To make it work as a soft-switch takes more components than you need to make it work - if the fellow in video does as I expect then listen to his explanation how his circuit is working and hopefully you will see how aortiz is suggesting to set it up; if you don't, just post back and if nobody has done it by the time I can find the time to do so I will draw you a straight-forward circuit diagram of aortiz' suggestion.
 
threw together a quick schematic. http://i.imgur.com/DhNyjcC.jpg. now for the parts, http://www.mouser.com/ds/2/395/TSM2N7000K_B12-522765.pdf should work fine for the lower channel, it doesn't take much current, basically the only important factor is the gate threshold, the voltage at which the mosfet starts to conduct and goes from acting like a variable resistor to where it starts working more like a switch (simplified). for the p-channel, something like this http://www.mouser.com/ds/2/149/FQP27P06-244293.pdf will give you plenty of headroom. basically the circuit works like this. a p-channel mosfet works well for controlling the positive side of things, there are 3 lines, a gate, a drain, and a source. for the p-channel, the source will go to the voltage input, the drain will go to the teensy power input, and the gate goes to the rest of the circuit. When the gate voltage is below the source voltage, the mosfet will start to conduct and allow power through. when it is at or above the source voltage, the mosfet will turn off. Now mosfet gates are very sensitive and require very little power to activate, which is why we need the 10k pullup resistor to the battery. if you leave the gate unconnected the voltage will float around, adding the resistor means that if nothing is pulling the gate voltage to ground, it will float up to the B+ voltage and turn off. to turn it on we ground it, which brings me to the n-channel. An n-channel is basically like the p-channel but you normally use it for switching the low side (ground) of circuits (simplified). when the gate voltage rises above the source, it will start to conduct, and when the gate is at or below source voltage, it will not. The n-channel has a resistor pulling its gate voltage to ground. So when nothing is acting on this circuit, the gate of the n-channel will be pulled to ground, turning it off. this will let the gate of the p-channel float high, which will also turn that one off also. no power flows through the teensy. when you apply a voltage to the n-channel mosfet, it will conduct, pulling the p-channel gate high, also making it conduct, letting power flow to the teensy. the teensy now being awake can use a digital pin to keep the n-channel pin high. when it needs to turn off, you can either pull that pin low or re-initialize it as an input pin which will accomplish the same thing.


So that's the basic operation of the circuit, sorry for the wall of text. If you need more info just post and ill come and elaborate/clean up my info.
also this post is pretty simplified, when you go into more advanced circuits you will find there are a lot of parameters when choosing mosfets, driving them, and choosing resistor values. for a simple circuit like this i just kind of threw together some pieces.
edit 2: my concentration is pretty poor at this moment, a second set of eyes may want to comb over this to make sure everything seems right.
 
@aortiz557: Had a squiz at your circuit, just 2 comments;

(1) N channel mosfet may be overkill where any cheap NPN transistor wired in similar fashion would do; of course exchanging GSD for BCE as appropriate.

(2) Diagram could indicate how to connect the MOM NO button, I would tie one end of the button to 3V3 rail and other end to a second 820R resistor connecting to the node formed by the Gate of your N channel mosfet and the two resistors biasing it.

A quick skim of your 'wall of text' (difficult reading, so packed) I spotted you wrote "when you apply a voltage to the n-channel mosfet, it will conduct, pulling the p-channel gate high, also making it conduct" where my confidence is supreme that when the N-channel mosfet conducts between Source and Drain it will pull the Gate of the P-channel mosfet low and then it will conduct because that is the kind of mosfets you have drawn - seems like you drew (and implemented well enough) enhancement mode mosfets in your schematic but switched to talking about depletion mode mosfets near the end of your wall(?)

I've been proved wrong before so, if you can, please do - it is how I really (eventually) learn :)


@LC475: Not sure it has been mentioned very clearly yet, so; probably best if your setup() routine sets the IO pin you choose as an output and sets that output to 'on' fairly early - just kill that output when you are ready to 'switch off'; switching the IO pin 'on' as early as possible isn't really absolutely necessary because the processor will have completed several thousands of cycles before your average human can get their finger off the button again but it just doesn't hurt to 'tick boxes' sooner rather than later.
 
oops, that n-channel should be pulling the p-gate low! thanks for looking at it! the rest you're probably right about also.
 
very welcome aortiz (regarding 'thanks for looking'), and thanks also (regarding 'probably right').

Re-reading the original post a moment ago it occurred to me that perhaps LC475 wouldn't mind hearing about doing it with a comparator rather than losing two pins on Teensy, and needing to write code to monitor ADC (watching battery voltage via a divider).

Also (@LC475), what kind of battery pack is that? asking because am used to 10.5V being a 'healthier' level at which to stop sucking juice out of 12V batteries; pertains more to SLA batteries than other chemistries perhaps but pretty sure I've been seeing Ni based battery specs stating that minimum as well.

If interested in a purely comparator based method using (something like) about 6 resistors, a comparator, an NPN transistor (may not be necessary, would have to start actually drawing a circuit (maybe even consult the qualified EE I have access to) to become sure), a P-channel mosfet and possibly a couple of capacitors (EE may make me add them if he sees my circuit diagram) then say so and if nobody beats me to the punch I will post a schematic that I will make our qualified EE look at before posting ;) (lol, if I can't find a pretty good example elsewhere on the internet from trying to for about 5 minutes before I bother drawing anything).
 
Not sure why you want another regulator(? did I find the wrong TL431 datasheet a moment ago?) where the 3.3V pin on Teensy 3.1 can provide one of the inputs to a regular comparator (eg., https://www.fairchildsemi.com/datasheets/LM/LM311.pdf) and the other input is sourced by voltage divider from the battery; 3.3V will remain 3.3V over a wide range of input voltages (prefer 3.7-5.5 on Vin on Teensy 3.x by memory) and the result from the voltage divider can be used by simple comparison to 'decide' whether or not to allow the circuit to continue to draw power.
 
it's not just a regulator, you can also use it kind of like a programmable zener, use like 3 external resistors and it should be able to cut the gate when the voltage gets lower than a certain point. they use it a lot for smps regulation, it's a pretty adaptable part.
 
To preserve the battery, after it has reached the minimum voltage you are willing for it to get to, the mosfet method is the least loss for the most gain as far as I can tell - reading the TL431 datasheet as carefully as I can (be bothered to, right now, soz) I cannot gain enough confidence that it can be set up to block the battery from being drained as much as a mosfet can.

Having re-read the OP even more carefully I have realised that the method(s) suggested so far will not stop the powertool being used beyond the battery's low voltage cut-off point.

To make it so that NOTHING can drain the battery when it has fallen below our threshold voltage the P-channel mosfet needs to be between the battery positive terminal and whatever was connected to that terminal beforehand.

I don't have a scanner near me atm but I have an old copy of protel99 and should be able to post a reasonable representation of how it should be wired for use with an IO pin within a couple of hours - LC475 hasn't responded with interest about the comparator alternative yet.
 
i completely forgot that it was a power tool. i wonder if it already has a mosfet on it for speed control. could probably just tap into that to make sure that section didn't run when the teensy wasn't on.
 
Depending on the aim there is a Teensy low power library which includes deep sleep options, but that will not actively inhibit anything else doing stuff. Faced with a lower power problem and having issues with getting the required drive voltages for a FET in the situations described above I cheated and used:

https://www.pololu.com/product/750

This comes with an 'off' input and while the circuit is designed for a momentary NO switch to toggle on/off I chased the circuit far enough to find that the terminal on the far end could be used as a uController 'on' switch. So your mechanical switch powers the micro while down, if the micro starts and finds enough power to flash the rest of the show it pulses the break out. If power is not ok it hits the 'off' input and everything shuts down.

If you can I'd suggest the options described above, but if you just want something that works and are prepared to trade money for time there are several break out boards that offer this sort of feature. The only reason I link to the pololu product is that it's the one I used. Sparkfun and Adafruit have similar breakouts and I'm assuming other suppliers do so as well. Other option as noted is to use an actual battery protection circuit but I haven't run across anything like that for 9-11 volts.
 
Last edited:
OK, I drew what I think is a reasonable enough circuit for LC475's purpose.

For Q1 an IRF9630 will probably suffice, Q2 can be practically any NPN transistor, including an old favorite of mine; BC547.
 

Attachments

  • battery-drain-stop.jpg
    battery-drain-stop.jpg
    170.2 KB · Views: 1,560
Thanks very much, I hope you are right and nobody can poke more holes in it than the lack of a protection diode across the mosfet (which may be built into an IRF9630 anyway, didn't check datasheet for current purpose; pretty sure it is adequate to task, at least till powertool turns out to pull more amps than I reckon it would)

Do all the M4's have the STOP mode? essentially off.

Oh! This is probably more than viable.

...

So, as it is right now, the tool will run until the battery pack voltage drops down around 5 volts, then the voltage regulator stops working and the Teeny shuts off and shuts everything else down with it. That's no good, because the batteries should only be discharged down to a minimum of 9.54V (3.18V per cell).

...

Set up voltage divider, for R1 (positive end) I'd use a 1M and for R2 (negative end) a 100K, that should make the junction voltage = (VBatt/(1M+100K))*100K, read the junction at as slow a rate as you like and then if you cannot go into stop mode I think you can just make the code not do whatever it does to run the tool and the person trying to use the tool should realise that the low-voltage cutoff mechanism has kicked in and go and plug that baby in.

If it was such a device that runs without an operator then some sort of circuit would have to be placed to make it stop draining the battery but it is not so such lengths aren't all that necessary.

Post your sketch, if you can't see how to do it, show us where your divider junction is connected and one of us should be happy enough to show some or other way of making it do what I expect can be done now.
 
Wow, guys, this is an unbelievable amount of help!

Glancing through, I like the idea of the remote-reset switch from Mouser, and I also really like the idea of the teensy going into a low-power hibernation mode or, even more promising-sounding, STOP mode. Even if it's not completely off, that could be OK, because being able to do without another whole board would be such an advantage. I think this could be a good solution as long as it's going to use a small enough amount of power that the user could take, say, 24 hours to get around to unplugging the battery from it and it's not going to wreck the battery. The principle I'm working off of is: let's do this in the easiest, cheapest way possible, adding the least amount of complication to the project.

Anyway, I've only skimmed the thread, those are my initial comments.

Well, I know what I'm going to be doing for the next hour! Reading, reading, reading.....

Thanks again!
 
Also, in the meantime while waiting for replies to this thread, I found the following products:

mini-12v-programmable-low-voltage-disconnect-lvd.jpg

http://www.reuk.co.uk/buy-MINI-12V-PROGRAMMABLE-LOW-VOLTAGE-DISCONNECT-LVD.htm


LowVoltCut-500x500.jpg
http://shop.fiberopticproducts.com/index.php?route=product/product&product_id=922

Both of which seem like they would probably do the job.

Currently, I am borrowing a battery protection PCB from an existing 12V power tool, and just wiring it directly to the battery plug-in terminals (as it was in the original tool), and then hooking all my stuff to its 12V output. So it's acting as the gatekeeper. Since this is exactly what it was designed to do in its original tool, I figure it is a safe bet and should work for sure. But obviously it would be nice to avoid having to buy an entire power tool just to cannibalize the PCB in the future, as I build more of these. Here it is:

IMG_3408[1].jpg
IMG_3410[1].jpg
 
Last edited:
So that's the basic operation of the circuit, sorry for the wall of text. If you need more info just post and ill come and elaborate/clean up my info.
OK! I watched the video and did not really understand it (I enjoyed his enthusiasm, though!). Then I read through a few explanations of transistors, and after reading Sparkfun's (which was the best one) I went back and skimmed through the video again and lo and behold, I understood it! I also understood aortiz557's first three replies! Progress!

Then I went through the "wall of text" one and hey, also not so bad. Good diagram, good explanation. I think you left out a momentary switch to pull the gate of the P-channel to ground in the first place to get the ball rolling, right? Because before the Teensy's on, there's no voltage to be sent to the N-Channel gate. "Chicken and egg" as the excited video guy put it. And, like his circuit, I would also need a capacitor to slow things down, otherwise pressing the button will lead to essentially a random result choosing between on or off, depending on how many microseconds the human held down the button. Right?

Another question, would this that you found: http://www.mouser.com/ds/2/395/TSM2N7000K_B12-522765.pdf work for high loads, like 40 watts? If I can replace this: https://www.adafruit.com/products/355 which I'm using for switching the main load with yours, that would be great, because it's smaller!

Actually, never mind, I think I just answered my own question. According to this it is for 0.2Amps and has 5 Ohms of resistance, which means it would heat up like crazy and then fry and definitely not work, if I'm understanding right. Low currents only for that little guy.

Well, I've made it through the first 7 posts of the thread. It does seem very doable to implement a simple circuit like this with two MOSFETS, a momentary switch and a capacitor, and a few resistors. However, if I can accomplish something acceptable with no additional parts and circuits whatsoever, that is even better. So now to look into the low-power and STOP modes on the Teensy.
 
Also (@LC475), what kind of battery pack is that?
64617_48-11-2420-lg.png


asking because am used to 10.5V being a 'healthier' level at which to stop sucking juice out of 12V batteries; pertains more to SLA batteries than other chemistries perhaps but pretty sure I've been seeing Ni based battery specs stating that minimum as well.
9.5V is the level at which Milwaukee's own tools seem to shut off, so it seemed like a good idea to just copy that. It's three Sanyo INR18650-15M cells. Some kind of lithium chemistry, I don't know the details, and the details seem in fact to be a secret Milwaukee and Sanyo are attempting to keep.

General principle is that the higher the cut-off voltage, the better for the battery, so you're right. However, the higher the cut-off voltage the shorter the run-time, so there's a balance. In all honesty, these cells can probably be discharged quite a bit lower, based on specs for other similar (or maybe identical) Sanyo cells. So it seems Milwaukee is erring on the side of more cycles and more years of service and against maximum capacity. Probably not a bad idea, so I'll just follow their lead.

If interested in a purely comparator based method using (something like) about 6 resistors, a comparator, an NPN transistor (may not be necessary, would have to start actually drawing a circuit (maybe even consult the qualified EE I have access to) to become sure), a P-channel mosfet and possibly a couple of capacitors (EE may make me add them if he sees my circuit diagram) then say so and if nobody beats me to the punch I will post a schematic that I will make our qualified EE look at before posting ;) (lol, if I can't find a pretty good example elsewhere on the internet from trying to for about 5 minutes before I bother drawing anything).
It does sound interesting. This is all good stuff to know, because who knows how things will work out between now and production. Maybe it'll make sense to do it that way.
 
Status
Not open for further replies.
Back
Top