looking for ideas on generating RGB colors from accelerometer + gyroscope

Status
Not open for further replies.

neep

Well-known member
Hi all, I'm fairly new to Arduino / Teensy but I do have a background in computer science and some electronics, from my studies long ago.

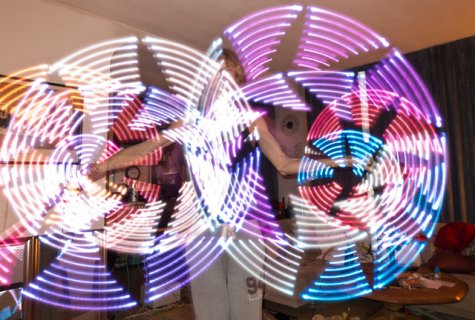
I'm working on a toy with addressable LEDs that I want to have change colors based on output from an accelerometer and a gyroscope. I have these in one MPU 6050 unit now and I'm able to read raw data, like so:

a/g: -1240 -2460 15652 48 -218 -363
a/g: -1200 -2468 15512 48 -257 -359
a/g: -1096 -2568 15600 40 -207 -363
[...]

These are accelerometer x,y,z and then gyroscope x,y,z. I understand what these values mean, but I want to make some nice color shifts with them, so that if you do this or that movement with the toy, you get a corresponding cool / fluid change in colors. I've already done this with just the accelerometer numbers of a different unit (ADXL345) and that seemed fairly straightforward. I didn't like the noisyness of it, but I suppose filters can solve that issue.

What I'm looking for is ideas for algorithms that I can let loose here, to create RGB colors, which can be 8 bits per color as I'm using a WS2801 LED strip. Since I now have 6 values to mix up it's getting a bit much. I'm not that good at math so perhaps anyone can help me out here with some formulas to try.

Thanks!
 
Do they spin fast enough to produce POV effect that you could use with strobed patterns (or even lettering, you have enough pixels)? Fast strobing is easy and fun. Maybe you can refresh fast enough to send quick pulses along the strip at certain speeds.

I haven't used a gyro. But wanted to try spin-based POV using an accelerometer. I think from some tests I made with nunchuks a while back, the |x^2 + y^2 + z^2| seems to give a smooth curve that follows swinging. But in the nunchuk case the accelerometer signals clipped at very low G's.

If you don't mind a bit of math, this app note has the equations to calculate pitch & roll,
http://www.freescale.com/files/sensors/doc/app_note/AN3461.pdf
or, in 'C', if ax is acceleration on the X axis and ax2 is ax*ax,
tiltX = atan(ax/sqrt(ay2+az2))*radToDegrees;
tiltY = atan(ay/sqrt(ax2+az2))*radToDegrees;
tiltZ = atan(sqrt(ay2+ax2)/az)*radToDegrees;
 
You can't really see it in the video, but I am doing some very basic POV using some simple update algorithm. The result:

img3029o.jpg


In psuedo code, I am doing:

10 retrieve color value based on gyro or accelero reading
20 "colorWipe" from ends of staff to middle with that color, with a few ms in between each pixel.
30 wait 5ms
40 "colorWipe" from ends of staff to middle with no color (lights off), with a few ms in between pixels.

"colorWipe" is a function that updates the pixels one by one in order. You can tell it to wipe from the middle to the ends, from the ends to the middle, or from one end to the other.

An alternative to the above is to use the other colorWipe modes, so instead of getting a star shape POV "cutout" like above, you get a star shape formed by the LEDs, instead, if you colorWipe from the middle to the outside. I now have 8 pixels on each side of the staff. Each pixels is 3 LEDs that are spaced 120 degrees apart, around the staff, for maximum visibility. I would like to pack more pixels in so I've ordered a WS2811 strip with 60 LEDs per meter, instead of the 32 I have now.

Thanks for the math! I am not good in math so I welcome getting any formulas to put into code. The values of the accelero and gyro are unsigned 16 bit numbers. I think I can probably set the G sensitivity but haven't found yet. However I'm not that easily clipping. What I am doing now to get colors out of the readings is this:

Code:
	// convert these 16 bit signed integers to something we can make colors out of

	// raw values can be positive or negative, depending on which direction 
	// the axis is going. Let's use the same color for the same force in both 

	// turn into positive-only value, as we can't generate negative colors.
	// accelero values
	uint16_t ax_abs = abs(ax);
	uint16_t ay_abs = abs(ay);
	uint16_t az_abs = abs(az);
	// gyro values
	uint16_t gx_abs = abs(gx);
	uint16_t gy_abs = abs(gy);
	uint16_t gz_abs = abs(gz);

        // we scale down to 8 bit numbers, as the 3 colors are 8 bits each.
	if (gyro) {
		red_uint8 = gx_abs / 128;
		green_uint8 = gy_abs / 128;
		blue_uint8 = gz_abs / 128;
	} else {
		red_uint8 = ax_abs / 128;
		green_uint8 = ay_abs / 128;
		blue_uint8 = az_abs / 128;
	}

	*red = red_uint8;
	*green = green_uint8;
	*blue = blue_uint8;

	// cancel out some noise
	*red < 4 ? *red = 0 : 1 ;
	*green < 4 ? *green = 0 : 1 ;
	*blue < 4 ? *blue = 0 : 1 ;

So this is very basic, but I would like to see if I can make the transitions more smooth.
 

Attachments

  • img3029o.jpg
    img3029o.jpg
    234.9 KB · Views: 1,062
Last edited:
Thanks for sharing the video...That looks like a fun project.

One idea might be to have different colored LEDs simulate marbles in the tube.
When you spin, the colors all go out to the ends, and become denser at the ends.
If you shake it back and forth, the colors would rattle back and forth.

Another, would be to change color, or intensity with the rate of rotation
spike in acceleration, could initiate an explosion in color


I ordered 20m of 68/m ws2811 lightstrips and just the other day ordered a gy-80 IMU like this one on eBay for $16.00

It should be fun
 
Hey Wozzy thanks for your suggestions. With the gyro based colorWipe modes, I'm already getting more intense colors as I spin / change angle faster now. When I hold the staff still it dims more, and is totally dimmed when I lay it down, so that's to be expected behaviour with a gyro.

As for the "marbles" idea, I really like that one. I'll see if I can implement something like that.

I would also like to do bitmap based POV, but don't have any code for that yet. I also need some extra memory if I'm going to be using bigger images, but I should be fine with say 10kB images for now, or just some characters to write with. I'm a little worried that 8 pixels per side isn't going to be enough, but it's a start until I get the higher density strips. Those may require more battery power anyway. I only have about 1200mAh available now.

If anyone has some drop-in POV (test) code for bitmaps that I can use or convert that would be highly appreciated!

BTW keep me posted on the 68 LEDs/m strips you ordered.

And I am using a GY-521 MPU 6050 module, like here described here: http://playground.arduino.cc/Main/MPU-6050

It was less than $10. I see the GY-80 has a compass and barometer probably making it more expensive. I doubt I need that anyway.
 
Last edited:
Nice!

If you're having problems with noisy data from the accel readings, one technique I find works pretty reliably is a "moving-average" filter, like this
Code:
long avg_value;
loop{
// add the new value to the moving average
avg_value = ( ( avg_value * 4 ) + new_value ) / 5
}
where a lower ratio (19/20, etc, instead of 4/5) increases the amount of smoothing.
 
Good one! I just tried this and it does help for the accelerometer. For the gyro I find it not that interesting as that's about sudden changes that I want to have reflect in the colors or at least the intensity anyway. I am now thinking I could use a mix: the accelerometer output for the color mix, and the gyro output for the overal brightness of the colors. I need to do some bitshifting logic to make that all happen, as I need to come up with a 24 bit number every time (8 bits per RGB color).
 
I've been coding for quite some hours through the night, and finally have a reasonably decent POV output, with some characters. The result:

img3232ac.jpg
 
Nice!

I've been coding for quite some hours through the night, and finally have a reasonably decent POV output, with some characters. The result:...

Excellent work!!! You've got a real knack for this.

I hope you got some sleep.... I do the same thing once I get my head into a fun project, I can't stop.

Once I get those new light strips, and the IMU, I'd love to play some with your code.
 
Last edited:
Thanks :)

Now I want to be able to display bitmaps using RGB coloring. 8 pixels per side is a bit limited, but a 4m 60LED/m 2811 strip is on the way. First I have to figure out how to read from the micro SD adapter I got from PJRC, or maybe upload bitmaps via bluetooth. All I can do with bluetooth now is very basic serial communications. What I have now is a few characters bitmapped as bool[]s, so it's lots of manual labor to add more. I rather do that with a little pixel editor app.
 
Sorry I'm late to the party on this. I might have an interesting approach for you. Your color changing might be much more fluid and natural if you convert from RGB to something more intuitive like HSV color space. If you are unfamiliar with HSV, it is slightly more visually intuitive than RGB for color representation, once you understand the model. Here is a brief explanation:
http://en.wikipedia.org/wiki/HSL_and_HSV

You could use per axis adjustments to change hue/saturation/brightness or something similar. I'm appending a library I wrote for a current project that you might find useful. It stores color as HSV, but then will return it as RGB when needed to send to the LED pins. It's currently configured for 255 scale RGB values, but you could easily change that to your needs. I've had great success using this so far and it's a lot easier to set custom colors using rotary faders and the like with HSV space instead of RGB (which most people don't find intuitive). Of course, this is beta, mostly undocumented and only lightly tested, but I know the conversion stuff works like a charm. Also, please don't ask why I decided to implement my own version of floor(). I'm pretty sure I was drunk at the time. Let me know if it's helpful at all!

HEADER
Code:
/*
  Color.h - Library for controlling RGB arcade buttons
  Created by Jesse R. Castro 2013-02-03
*/
#ifndef Color_h
#define Color_h

#include "Arduino.h"
#include <Common.h>

class Color
{
  public:
	//public vars
	
    //constructor
	Color(float pHue, float pSaturation, float pValue);
	Color(const Color& pColor);
        Color();
    //destructor
	
	//setters
	void setHue(float pHue);
	void setSaturation(float pSaturation);
	void setValue(float pValue);
	void setHSV(float pHue, float pSaturation, float pValue);
	//getters
	float getHue() const;
	float getSaturation() const;
	float getValue() const;
	int getRed();
	int getBlue();
	int getGreen();
	//action methods
	void turnOff();	
	//operator overloads
	Color& operator=(const Color &pColor);
	bool operator==(const Color &pColor) const;
	bool operator!=(const Color &pColor) const;
private:
    //private vars
	int red;
	int green;
	int blue;
	float hue;
	float saturation;
	float value;
	//setters
	void setRed(int pRed);
    void setGreen(int pGreen);
	void setBlue(int pBlue);
	void setRGB(int pRed, int pBlue, int pGreen);
	//getters
	
	//action methods
	
	//utilities
	void rgb2hsv();
	void hsv2rgb();
	float getMin();
	float getMax();
	int floor(float target);
};

#endif

IMPLEMENTATION
Code:
/*
  Color.cpp - Library for controlling RGB arcade buttons
  Created by Jesse R. Castro 2013-02-03
*/

#include "Color.h"

Color::Color(float pHue, float pSaturation, float pValue){
	setHSV(pHue, pSaturation, pValue);
}
Color::Color(const Color& pColor){
	*this = pColor;
}
Color::Color(){
	setHSV(0,0,0);
}
//setters
void Color::setHue(float pHue){
	//Note, of these hue cycles, so we have to make sure that works
	//abs gets rid of any negatives
	//the val - floor(val) will take return only decimal portions
	hue = abs(pHue) - floor(abs(pHue));
	
}
void Color::setSaturation(float pSaturation){
	if(pSaturation < 0){
		saturation = 0;
	}else if(pSaturation > 1){
		saturation = 1;
	}else{
		saturation = pSaturation;
	}
}
void Color::setValue(float pValue){
	if(pValue < 0){
		value = 0;
	}else if(pValue > 1){
		value = 1;
	}else{
		value = pValue;
	}
}
void Color::setHSV(float pHue, float pSaturation, float pValue){
	setHue(pHue);
	setSaturation(pSaturation);
	setValue(pValue);
}
void Color::setRed(int pRed){
	if(pRed < 0){
		red = 0;
	}else if(pRed > 255){
		red = 255;
	}else{
		red = pRed;
	}
}
void Color::setBlue(int pBlue){
	if(pBlue < 0){
		blue = 0;
	}else if(pBlue > 255){
		blue = 255;
	}else{
		blue = pBlue;
	}
}
void Color::setGreen(int pGreen){
	if(pGreen < 0){
		green = 0;
	}else if(pGreen > 255){
		green = 255;
	}else{
		green = pGreen;
	}
}
void Color::setRGB(int pRed, int pGreen, int pBlue){
	setRed(pRed);
	setGreen(pGreen);
	setBlue(pBlue);
}
//getters
float Color::getHue() const{
	return hue;
}
float Color::getSaturation() const{
	return saturation;
}
float Color::getValue() const{
	return value;
}
int Color::getRed(){
	hsv2rgb();
	return red;
}
int Color::getGreen(){
	hsv2rgb();
	return green;
}
int Color::getBlue(){
	hsv2rgb();
	return blue;
}

//action methods
void Color::turnOff(){
	setValue(0);
}
void Color::rgb2hsv(){
	float r = (red + 0)/255.0;
	float g = (green + 0)/255.0; 
	float b = (blue + 0)/255.0;
			
	float max = max(max(r, g), b);
	float min = min(min(r, g), b);
	
	float h = max;
	float s = max;
	float v = max;

	float d = max - min;
	s = max == 0 ? 0 : d / max;

	if(max == min){
		h = 0; // achromatic
	}else{
		if(max == r){
			h = (g - b) / d + (g < b ? 6 : 0);
		}else if (max == g){
			h = (b - r) / d + 2; 
		}else{
			h = (r - g) / d + 4; 
		}
		h /= 6;
	}

	setHue(h);
	setSaturation(s);
	setValue(v);
}
void Color::hsv2rgb(){
	float r, g, b;

	float h = hue;
	float s = saturation;
	float v = value;
	
	int i = floor(h * 6);	
	float f = h * 6 - i;
	float p = v * (1 - s);
	float q = v * (1 - f * s);
	float t = v * (1 - (1 - f) * s);

	switch(i % 6){
		case 0: r = v, g = t, b = p; break;
		case 1: r = q, g = v, b = p; break;
		case 2: r = p, g = v, b = t; break;
		case 3: r = p, g = q, b = v; break;
		case 4: r = t, g = p, b = v; break;
		case 5: r = v, g = p, b = q; break;
	}

	setRed(round(r*255));
	setGreen(round(g*255));
	setBlue(round(b*255));
	
}
float Color::getMin(){
	float r = (red + 0)/255.0;
	float g = (green + 0)/255.0;
	float b = (blue + 0)/255.0;
	
	if(r < g){
		if(r < b){
			return r;
		}else{
			return b;
		}
	}else{
		if(g < b){
			return g;
		}else{
			return b;
		}
	}
}
float Color::getMax(){
	float r = (red + 0)/255.0;
	float g = (green + 0)/255.0;
	float b = (blue + 0)/255.0;
	
	if(r > g){
		if(r > b){
			return r;
		}else{
			return b;
		}
	}else{
		if(g > b){
			return g;
		}else{
			return b;
		}
	}
}
int Color::floor(float target){
	int returnVal = round(target);
	if(returnVal > target){
		returnVal--;
	}
	return returnVal;
}
//operator overloads
Color& Color::operator=(const Color &pColor){
	setHSV(pColor.hue, pColor.saturation, pColor.value);	
	return *this;
}

/** 
 * Comparison == operator overload.
 * @author Jesse R. Castro
 * @param pFoo An instance of the same type as this object.
 * @return A boolean value describing whether the objects are equivalent or not.
 */
bool Color::operator==(const Color &pColor) const {
	if(
		(hue == pColor.hue) &&
		(saturation == pColor.saturation) &&
		(value == pColor.value)
	){
		return true;
	}else{
		return false;
	}
}
/** 
 * Comparison != operator overload.
 * @author Jesse R. Castro
 * @param pFoo An instance of the same type as this object.
 * @return A boolean value describing the inverse of whether the objects are equivalent or not.
 */
bool Color::operator!=(const Color &pColor) const {
	return !(*this == pColor);
}
 
You probably already got it done, but in case you didn't, maybe this can help too:

My 2.8" TFT screen contains an arduino code example to draw BMP files from SD to the screen, reading a preset amount of pixels and push them to the screen.
The default example can be found here, but I managed to convert it to use the new and improved SdFat library which can be found here (I mean the modified code, not the SdFat)

Not really written for POV, but I'm sure you can modify it to light LED's instead of display on screen.
I do have to mention that this only works for 24bit BMP's according to the README file...
 
Hey aedile thanks for this idea, I think it may be very helpful and I want to implement it. I've copied your code but I'm missing your Common.h:

In file included from Color.ino:6:0:
Color.h:9:20: fatal error: Common.h: No such file or directory
compilation terminated.

I removed the dependency on that and it compiles fine. I'm good without it?

Also, could you please give me an example of how your use your code from my main loop? I'm not a very experienced coder.

Thanks,

neep
 
Last edited:
Just a note, if you need every last drop of microprocessor processing power, the HSV library does everything in the float data type. The Teensy 3.0/2.0++/2.0, and the Arduinos all do not have floating point hardware. This means it will take several hundreds of instructions to simulate most floating point, and probably thousands of instructions to simulate divide. A lot of time, that doesn't matter, as the microprocessor might spend most of its time waiting for something to happen. But if you are trying to display lots of colors in real time, it might cause your code to run slowly.
 
HSV to RGB in integer

Both of these algorithms do HSV to RGB in integer only. The first one is speed optimized for 8bit, the second one provides smoother blending due to the higher resolution for "index" and may not be quite as speedy. On a Teensy3 it may not make much of a difference.

Code:
/*
HSV 0..255
*/
void HPRGB::goToHSB(uint8_t hue, uint8_t saturation, uint8_t value)
{
  uint8_t r, g, b;
  HSBtoRGB(hue, saturation, value, &r, &g, &b);
  goToRGB(r, g, b);
}

void HPRGB::HSBtoRGB(uint8_t h, uint8_t s, uint8_t v, uint8_t* r, uint8_t* g, uint8_t* b)
{

        if ( s == 0 )
        {
                *b = *g = *r = v;
        }
        else
        {       
                
                uint8_t i = (h*6)/256;
                uint16_t f = (h*6) % 256;

                uint16_t p = (v * (255 - s)) / 256;
                uint16_t q = (v * (255 - (s * f)/256)) / 256;
                uint16_t t = (v * (255 - (s * (255 - f))/256)) / 256;

                if      ( i == 0 ) { *r = v ; *g = t ; *b = p; } // 0   deg (r)   to 60  deg (r+g)
                else if ( i == 1 ) { *r = q ; *g = v ; *b = p; } // 60  deg (r+g) to 120 deg (g)
                else if ( i == 2 ) { *r = p ; *g = v ; *b = t; } // 120 deg (g)   to 180 deg (g+b)
                else if ( i == 3 ) { *r = p ; *g = q ; *b = v; } // 180 deg (g+b) to 240 deg (b)
                else if ( i == 4 ) { *r = t ; *g = p ; *b = v; } // 240 deg (b)   to 300 deg (b+r)
                else               { *r = v ; *g = p ; *b = q; } // 300 deg (b+r) to 0   deg (r)
        }

}

Code:
/*
HSV 0-768
*/
void HPRGB::goToHSB16(uint16_t hue, uint8_t saturation, uint8_t value)
{
	uint8_t r, g, b;
	HSBtoRGB16(hue, saturation, value, &r, &g, &b);
	goToRGB(r, g, b);
}

void HPRGB::HSBtoRGB16(uint16_t index, uint8_t sat, uint8_t bright, uint8_t* r, uint8_t* g, uint8_t *b  )
{
	uint16_t r_temp, g_temp, b_temp;
	uint8_t index_mod;
	uint8_t inverse_sat = (sat ^ 255);
	
	index = index % 768;
	index_mod = index % 256;
	
	if (index < 256)
	{
		r_temp = index_mod ^ 255;
		g_temp = index_mod;
		b_temp = 0;
	}
	
	else if (index < 512)
	{
		r_temp = 0;
		g_temp = index_mod ^ 255;
		b_temp = index_mod;
	}
	
	else if ( index < 768)
	{
		r_temp = index_mod;
		g_temp = 0;
		b_temp = index_mod ^ 255;
	}
	
	else
	{
		r_temp = 0;
		g_temp = 0;
		b_temp = 0;
	}
	
	r_temp = ((r_temp * sat) / 255) + inverse_sat;
	g_temp = ((g_temp * sat) / 255) + inverse_sat;
	b_temp = ((b_temp * sat) / 255) + inverse_sat;
	
	r_temp = (r_temp * bright) / 255;
	g_temp = (g_temp * bright) / 255;
	b_temp = (b_temp * bright) / 255;
	
	*r = (uint8_t)r_temp;
	*g = (uint8_t)g_temp;
	*b = (uint8_t)b_temp;
}
 
Here's an integer one I wrote for one of OctoWS2811's examples.

Code:
// Convert HSL (Hue, Saturation, Lightness) to RGB (Red, Green, Blue)
//
//   hue:        0 to 359 - position on the color wheel, 0=red, 60=orange,
//                            120=yellow, 180=green, 240=blue, 300=violet
//
//   saturation: 0 to 100 - how bright or dull the color, 100=full, 0=gray
//
//   lightness:  0 to 100 - how light the color is, 100=white, 50=color, 0=black
//
int makeColor(unsigned int hue, unsigned int saturation, unsigned int lightness)
{
        unsigned int red, green, blue;
        unsigned int var1, var2;

        if (hue > 359) hue = hue % 360;
        if (saturation > 100) saturation = 100;
        if (lightness > 100) lightness = 100;

        // algorithm from: http://www.easyrgb.com/index.php?X=MATH&H=19#text19
        if (saturation == 0) {
                red = green = blue = lightness * 255 / 100;
        } else {
                if (lightness < 50) {
                        var2 = lightness * (100 + saturation);
                } else {
                        var2 = ((lightness + saturation) * 100) - (saturation * lightness);
                }
                var1 = lightness * 200 - var2;
                red = h2rgb(var1, var2, (hue < 240) ? hue + 120 : hue - 240) * 255 / 600000;
                green = h2rgb(var1, var2, hue) * 255 / 600000;
                blue = h2rgb(var1, var2, (hue >= 120) ? hue - 120 : hue + 240) * 255 / 600000;
        }
        return (red << 16) | (green << 8) | blue;
}

unsigned int h2rgb(unsigned int v1, unsigned int v2, unsigned int hue)
{
        if (hue < 60) return v1 * 60 + (v2 - v1) * hue;
        if (hue < 180) return v2 * 60;
        if (hue < 240) return v1 * 60 + (v2 - v1) * (240 - hue);
        return v1 * 60;
}
 
I haven't implemented any of the latest code suggestions yet, but I did make a video last night of what I have so far:

http://www.youtube.com/watch?v=ob8jcgis0LU

Basically what I'm doing is using each accelero + gyro axis to generate an 256 bit value for RGB. I'd like to reduce the "whiteness" when spinning fast, perhaps switching to HSV will do that for me.
 
You probably already got it done, but in case you didn't, maybe this can help too:

My 2.8" TFT screen contains an arduino code example to draw BMP files from SD to the screen, reading a preset amount of pixels and push them to the screen.
The default example can be found here, but I managed to convert it to use the new and improved SdFat library which can be found here (I mean the modified code, not the SdFat)

Not really written for POV, but I'm sure you can modify it to light LED's instead of display on screen.
I do have to mention that this only works for 24bit BMP's according to the README file...

@ZTiK.nl, I've been looking into your code mods for reading 24bit bmp from sd card for tft screen. I have modified it to be blind to the screen, but to include octows2811 for output to led strip. I think that the section i need to alter is:

if(lcdidx > 0) {
tft.pushColors(lcdbuffer, lcdidx, first);
}
but this hangs the output (checking with Serial.print). Without adding in the leds.setPixel(…) ledsShow() lines, the output is:

Initializing SD card...OK!
Loading image 'circle.bmp'
File opened.
File size: 27174
Image Offset: 54
Header size: 40
Bit Depth: 24
Image size: 150x60
Loaded in 79 ms
0

Any pointers would be useful. I have a feeling that buffer size needs to be looked at, and the fact that ws2811 are 24bit pixels and I think that this code is looking at 16bit pixel output ( is that correct?). The other section of the code that I have a query about is this:

// Convert pixel from BMP to TFT format
b = sdbuffer[buffidx++];
g = sdbuffer[buffidx++];
r = sdbuffer[buffidx++];
lcdbuffer[lcdidx++] = tft.color565(r,g,b);

I have commented out the lcdbuffer line to get the code to compile, but need to understand the tft.color565 argument.

mortonkopf
 
Last edited:
in response to getting BMP images from SD card and then displaying in a POV, I have finally managed to get the Teensy 3 to read the SD card file using SDFat, and display to the POV using OctoWS2811. For a set of 60 leds it show the full bitmap of 60x150 in approx 290ms.

the code the ZTik.nl pointed to was very useful. the changes were reasonably straight forward:

Code:
            // set pixel
            b = sdbuffer[buffidx++];
            g = sdbuffer[buffidx++];
            r = sdbuffer[buffidx++];

            povbuffer[povidx++] = Color(b,g,r);//octo colour
          }
        for(int i=0;i<ledsPerStrip;i++){
   leds.setPixel(i, povbuffer[i]); }
        leds.show();

I will post up the full code in a new thread to make it easy to find
mortonkopf
 
Status
Not open for further replies.
Back
Top