Teensy 3.1 not working after soldering the headers.

Status
Not open for further replies.

svatasoiu

Member
I have 2 Teensy 3.1 (from Sparkfun) that stopped working after I soldered the headers.
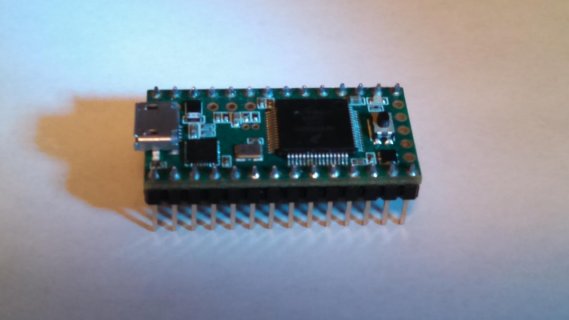
IMG_20140601_192837_028.jpgIMG_20140601_192849_960.jpg
I tried both of them before soldering the headers and they worked correctly: I was able to load the blink program, driver installed correctly, everything worked. After i installed the headers, both stopped working, they were not recognized by the same machine where they worked before, the driver said the device malfunctioned and cannot communicate, Arduino IDE was not able to upload any program into them.
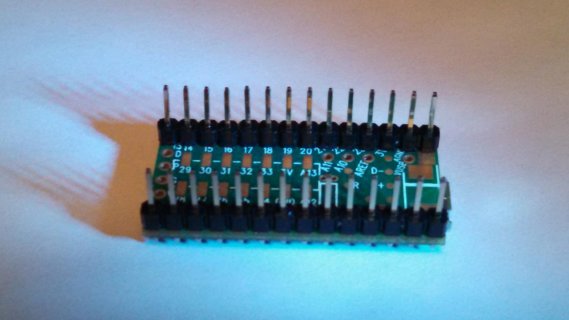
I did the soldering carefully (see pictures) and used the soldering iron on 20W setting.
I can understand one Teensy going bad, but for 2 of them to do the same thing, it is strange.
Either I miss something basic, or i got an defective batch or ...

Do you have any idea what may have happend, or what I can try ?

Thank you
:(
 
Do you have any idea what may have happend, or what I can try ?

Pull out a DMM and see what the resistance is from pin to pin, especially VUSB-GND, VIN-GND, and any of the 3.3V-GND connections. A short on any of them would lead to a dead Teensy. DO NOT use the audio function on the DMM (if so equipped) to determine continuity. The current is too high and you will damage the chip. ONLY use the resistance function.

I'd also confirm that the pin attached to the LED (13?) is not shorted either. Otherwise, every time the teensy tries to blink, it encounters a dead short that could lead to the Teensy power supply collapsing, a CPU reset, damage, etc. among other possibilities.

If there is a short between any of the above pins and GND, there is your answer. The wattage setting on the soldering iron has likely little to do with the problem since the iron is not touching any chip pins directly. However, if the temperature was too low, you might get a cold solder joint.

Other things to try include holding the PGM button and then trying to upload a sketch afterwards. FWIW, your solder joints look good in the fuzzy picture you took, but the devil is in the details, thus, check them with a DMM.
 
Take a magnifying glass and inspect carefully especially the pins beside the processor pads.
 
The first test for a "dead" Teensy is measuring the power. VIN to GND should show 5V (or whatever your USB cable provides, which should be close to 5 volts). The 3.3V pin should be 3.3 volts, of course.

The solder joints look ok in those photos. It's impossible to see any hair-thin shorts, which might be causing trouble. It's also impossible to see what type of chemical flux was in the solder. If it's acid code, which is normally only used for stained glass art, the residue could cause trouble.
 
Thanks to all that reply.
I checked the board under magnifying glass, but I could not see anything like a short.
I did anyway a good cleaning with alcohol and a soft brush and some improvements did happened:
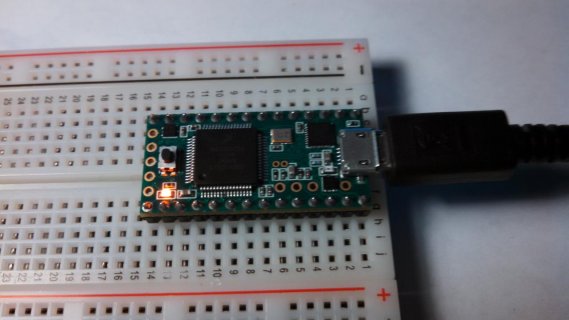
IMG_20140602_192215_273.jpgIMG_20140602_192407_528.jpg

On one computer, the board start blinking, this must be the original program from the factory.
The board it is still not recognized (I cannot see a new COM (for Teensy) port under Device Manager), so I cannot upload new programs.
Here I may be confused how do I need to use the reset button on Teensy to load a new program. Can somebody give me a quick explanation when the reset button is used?

When I connect it to another machine (both Win 7) nothing is happening, it is not blinking.
It is possible to reset/reinstal the driver for it?
 
On one computer, the board start blinking, this must be the original program from the factory.
The board it is still not recognized (I cannot see a new COM (for Teensy) port under Device Manager), so I cannot upload new programs.
It is the original program, yes.
If you are used to Arduino boards (which always show up as a COM port) Teensy is not like that. Try compiling and uploading a sample program.

Here I may be confused how do I need to use the reset button on Teensy to load a new program. Can somebody give me a quick explanation when the reset button is used?
After you compile (top left icon in the Arduino window) you then upload (second from left button). A new small window appears (the Teensy loader) and tells you to press the button.
 
I have better news now.
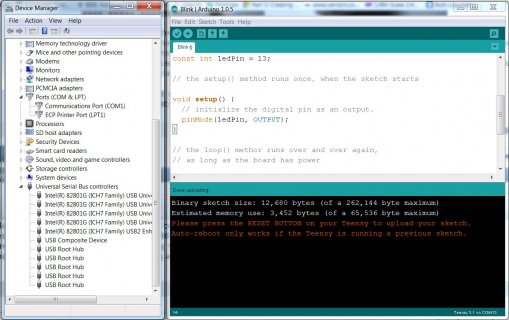
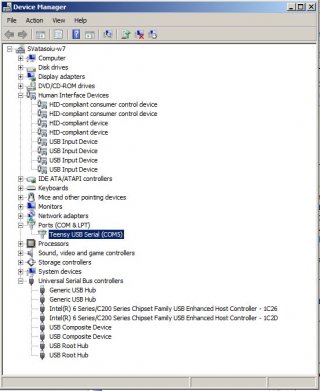
After the cleaning, today, I did installed all (Arduino IDE + Teensyduino) an a new computer and when I did connected the Teensy to this last computer, everything works fine:
Teensy device manager.JPG
The com port gets created, drivers installed, I can load programs and Teensy responds correctly.
Now, I cannot replicate the same behavior when I try to other PC's where I did try to use the Teensy before: on those PC's, the COM ports does not get created and the drivers do not recognize the Teensy.
On those machines I did tried to connect multiple Teensy's one after other.
Can this cause any issues?

I know this was happening also for some Arduino's if i use multiple boards on the same PC.
How can I "clean" a PC of the previous Teensy drivers, and how can I "free up" COM ports used to connect to various Teensy?
 
I'm having similar issues on a Mac. I have 3 new 3.1s and none of them are showing up in /dev/tty. I have a bunch of 3.0s that are working fine and I'm having no issues with programming. New installation of TD & reboot. It looks like the hardware is working fine. The test program runs (and responds to the button press) but nothing shows up as connecting.

It's strange because the 3.0s are all working fine and none of the 3.1s are connecting. From what I can see the USB chips are unchanged.

Thoughts? Suggestions?
 
I'm having similar issues on a Mac. I have 3 new 3.1s and none of them are showing up in /dev/tty.

Perhaps everything is working, but your boards are simply programmed with a non-Serial program?

There's a detailed explanation on the troubleshooting page. Scroll down to "No Serial Port While Programming".

http://www.pjrc.com/teensy/troubleshoot.html

Teensy only becomes a USB serial device when it runs a program that makes it so (eg, built with Tools > USB Type set to "Serial"). When it's in programming mode, it's a HID device, not serial. Likewise, when it's programmed with non-serial device type, it'll never show up as a serial device.

Before late-2013, we pre-programmed all Teensy 3.0's with the LED blink example configured to be a USB serial device. In late 2013, close to the release of Teensy 3.1, we changed the default LED blink from Serial to RawHID.

This change was motivated by the frustrating experience many users faced on Microsoft Windows. Even though the driver is part of Windows, it doesn't load by default until an INF file is installed. Windows prompts the user to install a driver. Running the Teensyduino installer, or the stand-alone serial installer does exact this. But we found many Windows users would go down a fruitless path of searching for the driver online, or they would attempt all sorts of crazy things to solve the "driver problem", without realizing they simply need to run the installer we provide. With this change, Windows detects the Teensy as a HID device, which doesn't cause Windows to prompt for a driver. It only becomes a serial device when programmed from Arduino, and that can generally only happen after running the Teensyduino installer, which adds the INF "driver". This simple change has dramatically improved the feedback we hear from people using Windows.

However, if you're used to the Arduino paradigm of "everything is a serial port", Teensy's native USB can be confusing. Teensy can become several different things, depending on the setting in Tools > USB Type when you verify or upload your sketch.
 
Last edited:
Thanks Paul. Yes, it was an RTFM moment. Hate when that happens.

I needed to make some updates to my makefiles & library creation and all is good now.

Thanks again,
mauricio
 
Status
Not open for further replies.
Back
Top