audio "sticking"

Status
Not open for further replies.
Hey guys, I am trying to start an audio project, im just in the testing phase and have run into something. Im using and FFT and a peak, no matter which one I use, the audio sticks.
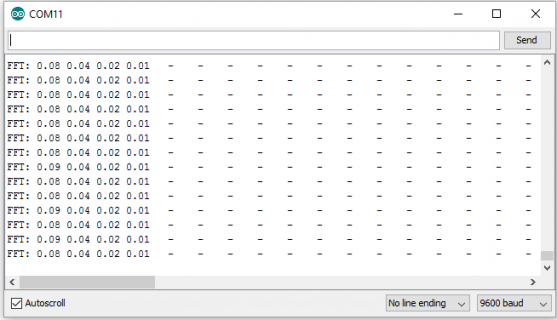
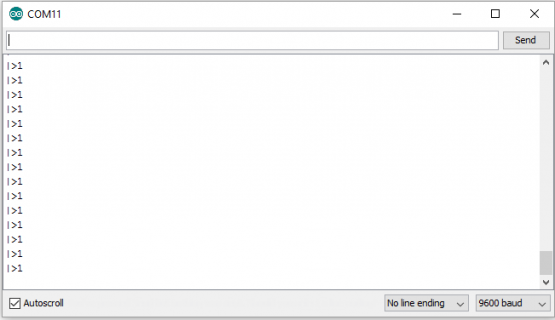
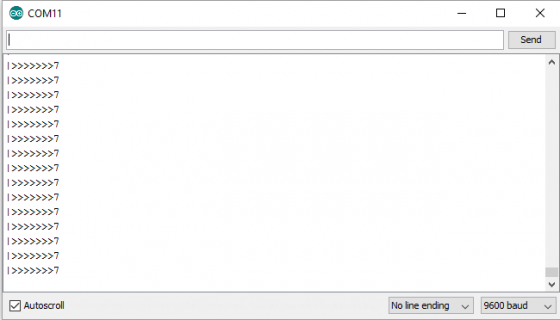
Cant really explain, but look at the images, when the sketch starts, all the audio is 0.0, and when the mic pics up audio the lower parts keep values, the louder the audio the more stays. I did try different mics with the same result.
before audio
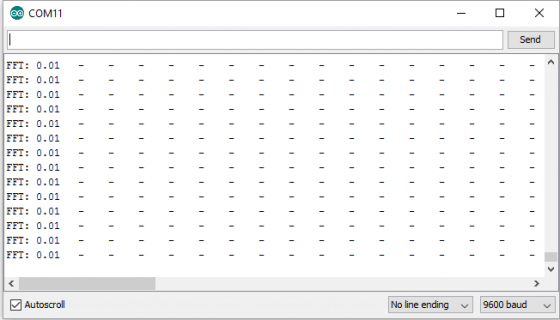
2016-08-16.png
after audio
2016-08-16 (1).png

The code is very basic.
Code:
/* Mono Peak Meter

   Scrolling peak audio level meter in the Arduino Serial Monitor

   Audio input needs to connect to pin 16 (A2).  The signal range is 0 to 1.2V.
   See the documentation in the Audio System Design Tool for the recommended
   circuit to connect an analog signal.

   This example code is in the public domain
*/

#include <Audio.h>
#include <Wire.h>
#include <SPI.h>
#include <SD.h>
#include <SerialFlash.h>

// GUItool: begin automatically generated code
AudioInputAnalog         adc1(A0);       //xy=413,132
AudioAnalyzePeak         peak1;          //xy=637,122
AudioAnalyzeFFT256       myFFT;       //xy=654,240
AudioConnection          patchCord1(adc1, peak1);
AudioConnection          patchCord2(adc1, myFFT);
// GUItool: end automatically generated code


void setup() {
  AudioMemory(24);
  Serial.begin(9600);

  myFFT.windowFunction(AudioWindowHanning1024);
}

// for best effect make your terminal/monitor a minimum of 31 chars wide and as high as you can.

elapsedMillis fps;

void loop() {

  getFFT();
  
  //getPeak();
}

void getFFT() {
  float n;
  int i;

  if (myFFT.available()) {
    // each time new FFT data is available
    // print it all to the Arduino Serial Monitor
    Serial.print("FFT: ");
    for (i=0; i<40; i++) {
      n = myFFT.read(i);
      if (n >= 0.01) {
        Serial.print(n);
        Serial.print(" ");
      } else {
        Serial.print("  -  "); // don't print "0.00"
      }
    }
    Serial.println();
  }
}

void getPeak()
{
  if (fps > 24) {
    if (peak1.available()) {
      fps = 0;
      int monoPeak = peak1.read() * 30.0;
      Serial.print("|");
      for (int cnt=0; cnt<monoPeak; cnt++) {
        Serial.print(">");
      }
      Serial.println(monoPeak);
    }
  }
}

Any ideas what is going on?
 
Teensy 3.2, no audio shield.
Tried both the adafruit and sparkfun Electet microphone.
Sorry wrote this last night after a long day ;)
 
Teensy 3.2, no audio shield.
Tried both the adafruit and sparkfun Electet microphone.
Sorry wrote this last night after a long day ;)

I tried to compile the sketch, it does, I tried to download, it failed : download error (after erase)
win10, A1.6.9 TD1.29b3
(strange never had such errors)

OK,
I could not download blink (applying all know tricks)
had to remove all USB disks on the Hub, then succeeded to download blink.
will try again

edit2: now will ask button press, and after button press will not react.
Have no idea, what is going on
most likely, I have to step back and try to find out
 
Last edited:
Maybe because there is no output-object.
Try to add one, just as a dummy..

Like this?
Code:
AudioInputAnalog         adc1(A0);       //xy=232,162
AudioAnalyzePeak         peak1;          //xy=456,152
AudioAnalyzeFFT256       myFFT;          //xy=473,270
AudioOutputAnalog        dac1;           //xy=583,208
AudioConnection          patchCord1(adc1, peak1);
AudioConnection          patchCord2(adc1, myFFT);
AudioConnection          patchCord3(adc1, dac1);

I can test when I get home from work, for some reason the teensy cant communicate with my work computer :(
 
Two things I don't see in the original code:

AudioControlSGTL5000 audioShield;

among your definitions, and

audioShield.enable();

in setup()
 
@DerekR, he does not use the shield.

Right. I do have one, but this project only needs the fft and the peak, so I dont see a reason to use it and add the extra space needed, plus, I have 3 teensys for different things all going to be running the same code, so that would be three audio boards also.
 
Wow - I had assumed that you needed a codec to run Audio library stuff in order to manage I/O and bundling data into blocks etc. I'll have to go back and look at just what the SGTL5000 does here...

Maybe I'm extra dumb, but I don't see any sampling rate control, data acquisition, and timing anywhere in the sketch. How/where are the length 128 audio blocks created and passed to the fft and peak functions in this sketch?
 
Last edited:
no, indeed, the teensy does all the work.
there are several output-objects - the (hardware-wise) simplest are the internal DAC and S/PDIF
 
Wow - I had assumed that you needed a codec to run Audio library stuff in order to manage I/O and bundling data into blocks etc. I'll have to go back and look at just what the SGTL5000 does here...

Maybe I'm extra dumb, but I don't see any sampling rate control, data acquisition, and timing anywhere in the sketch. How/where are the length 128 audio blocks created and passed to the fft and peak functions in this sketch?

I took the code directly from the PeakMeterMono example sketch.

Code:
/* Mono Peak Meter

   Scrolling peak audio level meter in the Arduino Serial Monitor

   Audio input needs to connect to pin 16 (A2).  The signal range is 0 to 1.2V.
   See the documentation in the Audio System Design Tool for the recommended
   circuit to connect an analog signal.

   This example code is in the public domain
*/

#include <Audio.h>
#include <Wire.h>
#include <SPI.h>
#include <SD.h>
#include <SerialFlash.h>

// GUItool: begin automatically generated code
AudioInputAnalog         adc1;           //xy=164,95
AudioAnalyzePeak         peak1;          //xy=317,123
AudioConnection          patchCord1(adc1, peak1);
// GUItool: end automatically generated code


void setup() {
  AudioMemory(4);
  Serial.begin(9600);
}

// for best effect make your terminal/monitor a minimum of 31 chars wide and as high as you can.

elapsedMillis fps;

void loop() {
  if (fps > 24) {
    if (peak1.available()) {
      fps = 0;
      int monoPeak = peak1.read() * 30.0;
      Serial.print("|");
      for (int cnt=0; cnt<monoPeak; cnt++) {
        Serial.print(">");
      }
      Serial.println();
    }
  }
}
 
Okay. Did you see that
" AudioInputAnalog has a known bug at 72 MHz. Use 48 or 96 MHz clock speed (Tools > CPU Speed menu). "
in the documentation. I guess you're using 96 MHz anyway, so that's probably not the cause of the problem... just a thought.

I've just been called for dinner, but I'll try it here after that and get back to you. (I'll try using the Audio library sine as an input as well)

Im pretty sure im at 96 also but will check when I get home.
 
Okay so here's the deal (I hope) :)
1) Your code is basically "borrowed" from the Teensyduino FFT example File>Examples>(Teensyduino)Audio>Analysis>FFT without the Audio shield stuff.
2) Every sketch for the Audio library MUST have an output block - even if it not used.
3) I modded your code to use a sine input at 1037 Hz, which in a 1024 pt FFT creates a single line in bin 6, and removed the Hanning window so as not to smear the peak.
Code:
/* Mono Peak Meter

   Scrolling peak audio level meter in the Arduino Serial Monitor

   Audio input needs to connect to pin 16 (A2).  The signal range is 0 to 1.2V.
   See the documentation in the Audio System Design Tool for the recommended
   circuit to connect an analog signal.

   This example code is in the public domain
*/

#include <Audio.h>
#include <Wire.h>
#include <SPI.h>
#include <SD.h>
#include <SerialFlash.h>

// GUItool: begin automatically generated code
AudioSynthWaveformSine   sine1;       //xy=413,132
AudioAnalyzePeak         peak1;       //xy=637,122
AudioAnalyzeFFT256       myFFT;       //xy=654,240
AudioOutputAnalog        dummyOutput;               //  <---- Necessary even though not used

AudioConnection          patchCord1(sine1, peak1);
AudioConnection          patchCord2(sine1, myFFT);

void setup() {
  AudioMemory(24);
  Serial.begin(9600);
  delay(2000);
  sine1.amplitude(0.5);
  sine1.frequency(1034.007);                     // Line 6 in FFT1024
  myFFT.windowFunction(NULL);                    // Changed to give a "clean" spectral line
//  myFFT.windowFunction(AudioWindowHanning1024);
}
elapsedMillis fps;
void loop() {
  getFFT();
  //getPeak();
}

void getFFT() {
  float n;
  int i;
//Serial.println("in getFFT");
  if (myFFT.available()) {
    // each time new FFT data is available
    // print it all to the Arduino Serial Monitor
    Serial.print("FFT: ");
    for (i=0; i<40; i++) {
      n = myFFT.read(i);
      if (n >= 0.01) {
        Serial.print(n);
        Serial.print(" ");
      } else {
        Serial.print("  -  "); // don't print "0.00"
      }
    }
    Serial.println();
  }
}

void getPeak()
{
  if (fps > 24) {
    if (peak1.available()) {
      fps = 0;
      int monoPeak = peak1.read() * 30.0;
      Serial.print("|");
      for (int cnt=0; cnt<monoPeak; cnt++) {
        Serial.print(">");
      }
      Serial.println(monoPeak);
    }
  }
}
Without the line
AudioOutputAnalog dummyOutput;
myFFT.available() never returns true, and so data is never read from the fft buffer, but as soon as I added it everything came to life with the correct frequency and amplitude.
View attachment 7885

Hope this fixes it for you.
 
Last edited:
Okay so here's the deal (I hope) :)
1) Your code is basically "borrowed" from the Teensyduino FFT example File>Examples>(Teensyduino)Audio>Analysis>FFT without the Audio shield stuff.
2) Every sketch for the Audio library MUST have an output block - even if it not used.
3) I modded your code to use a sine input at 1037 Hz, which in a 1024 pt FFT creates a single line in bin 6, and removed the Hanning window so as not to smear the peak.
Code:
/* Mono Peak Meter

   Scrolling peak audio level meter in the Arduino Serial Monitor

   Audio input needs to connect to pin 16 (A2).  The signal range is 0 to 1.2V.
   See the documentation in the Audio System Design Tool for the recommended
   circuit to connect an analog signal.

   This example code is in the public domain
*/

#include <Audio.h>
#include <Wire.h>
#include <SPI.h>
#include <SD.h>
#include <SerialFlash.h>

// GUItool: begin automatically generated code
AudioSynthWaveformSine   sine1;       //xy=413,132
AudioAnalyzePeak         peak1;       //xy=637,122
AudioAnalyzeFFT256       myFFT;       //xy=654,240
AudioOutputAnalog        dummyOutput;               //  <---- Necessary even though not used

AudioConnection          patchCord1(sine1, peak1);
AudioConnection          patchCord2(sine1, myFFT);

void setup() {
  AudioMemory(24);
  Serial.begin(9600);
  delay(2000);
  sine1.amplitude(0.5);
  sine1.frequency(1034.007);                     // Line 6 in FFT1024
  myFFT.windowFunction(NULL);                    // Changed to give a "clean" spectral line
//  myFFT.windowFunction(AudioWindowHanning1024);
}
elapsedMillis fps;
void loop() {
  getFFT();
  //getPeak();
}

void getFFT() {
  float n;
  int i;
//Serial.println("in getFFT");
  if (myFFT.available()) {
    // each time new FFT data is available
    // print it all to the Arduino Serial Monitor
    Serial.print("FFT: ");
    for (i=0; i<40; i++) {
      n = myFFT.read(i);
      if (n >= 0.01) {
        Serial.print(n);
        Serial.print(" ");
      } else {
        Serial.print("  -  "); // don't print "0.00"
      }
    }
    Serial.println();
  }
}

void getPeak()
{
  if (fps > 24) {
    if (peak1.available()) {
      fps = 0;
      int monoPeak = peak1.read() * 30.0;
      Serial.print("|");
      for (int cnt=0; cnt<monoPeak; cnt++) {
        Serial.print(">");
      }
      Serial.println(monoPeak);
    }
  }
}
Without the line
AudioOutputAnalog dummyOutput;
myFFT.available() never returns true, and so data is never read from the fft buffer, but as soon as I added it everything came to life with the correct frequency and amplitude.
View attachment 7885

Hope this fixes it for you.

Yeah, I am just a hack and this is the easiest way for me to learn, grab pieces of code and put them together and try :)

Sadly, this didnt fix it.
I switched it to the peak test which is also borrowed from the example, same result.
I added a dummy output and even connected a patch cord as a pass thru.
Im going to try on one of my other teensys

Image on the left is after its turned on, image on the right is how it settles after putting some loud noises into the mic.

2016-08-17.png2016-08-17 (1).png
 
Ok, I made a brand new one, I had another teensy that wasnt put together yet, and its exactly the same. Tried the mic on A0 again, then switched to A1 and its the same.. made a little vid and put it on youtube to make it easier to see what is going on.
https://youtu.be/zfhD5u0v0AM
 
As a note, I just tried the example FFT with my audio shield and it works as expected.
I guess the next is to test the mic output and see if the signal is sticking there or if its in the teensy?
 
It's a real head scratcher! Obviously your loop() is still running, and data is available, but the data is not being updated in the fft and peak functions. Interesting that it runs with the audio shield.


I've looked at the peak object's analyze_peak.h and analyze_peak.cpp: they are VERY simple. I can't see anything there that would cause a data dependent failure.

Another puzzlement is why your original post ran without an output object.???

Is there any chance you might have an old/corrupt copy of the audio library or teensyduino?

Its the newest teensyduino, just installed it I believe, and I had it install audio that came with it, I can reinstall. Its arduino 1.6.5 cause the newer ones with teensy dont seem to work with FastLED correctly.
As a note, the audio shield one is working thru the mic input with a microphone, not thru the adc, I can also test that tonight.
I wish I could test at work, but whenever I try to connect the serial monitor arduino reports "Port Busy" any idea what that could be? I did remove the old teensy drivers and tried the windows one since I am on windows 10 and the same reslult
 
Status
Not open for further replies.
Back
Top