Hey guys just got my teensy 3.1 yesterday and have been doing some of the tutorials since im new to microcontrollers and coding in general.
I was having great success and working towards the code for my own custom joystick.
I was testing a variation of the example joystick codes (minimalized for my breadboard tests, code is at the bottom). The device was up and running great and recognized as a controller in a few of my games but I wanted to try and calibrate my main x and y axis'.
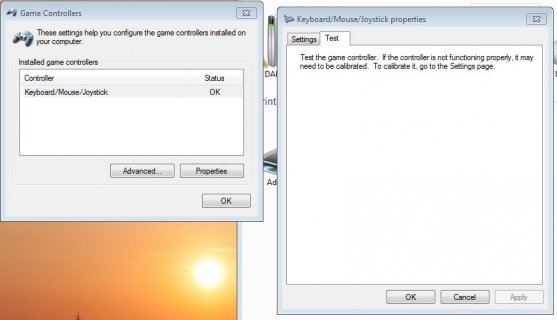
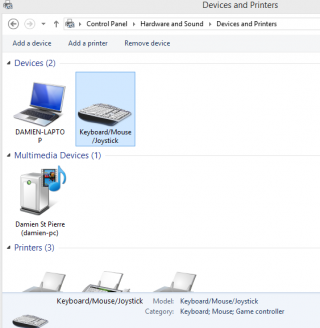
When I go to the properties of the game controller (in Devices and printers) the test screen is blank and under the settings tab the calibrate button is greyed out (this is on y main windows 7 pc).

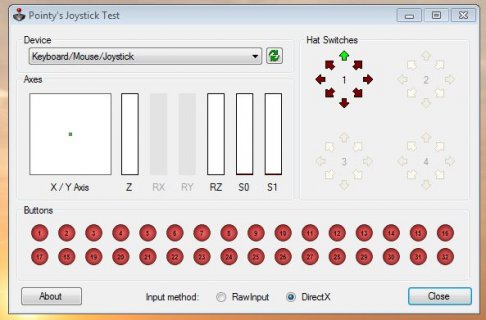
Using pointy's joystick test program i can also see the controller and watch the buttons and axis change. Windows 7 is definitely seeing it and like I say it is working my games, I just cant calibrate it

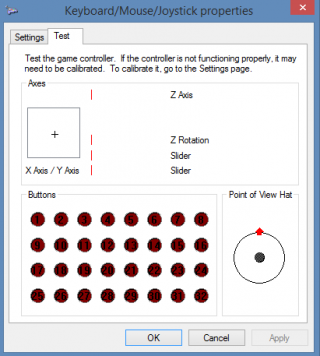
I then tried on my windows 8 laptop and it worked perfectly. I could see the live test view and also calibrate


Ive tried uninstalling all my usb drivers on my windows 7 pc, different usb port and other usb joystick example codes and nothing has worked. Ive also tried the ctrl-shift click on the properties button and that didnt work either.
Any help would be greatly appreciated.
I was having great success and working towards the code for my own custom joystick.
I was testing a variation of the example joystick codes (minimalized for my breadboard tests, code is at the bottom). The device was up and running great and recognized as a controller in a few of my games but I wanted to try and calibrate my main x and y axis'.
When I go to the properties of the game controller (in Devices and printers) the test screen is blank and under the settings tab the calibrate button is greyed out (this is on y main windows 7 pc).

Using pointy's joystick test program i can also see the controller and watch the buttons and axis change. Windows 7 is definitely seeing it and like I say it is working my games, I just cant calibrate it

I then tried on my windows 8 laptop and it worked perfectly. I could see the live test view and also calibrate


Ive tried uninstalling all my usb drivers on my windows 7 pc, different usb port and other usb joystick example codes and nothing has worked. Ive also tried the ctrl-shift click on the properties button and that didnt work either.
Any help would be greatly appreciated.
Code:
/* Basic USB joystick Code (modified)

   Pushbuttons should be connected to digital pins 12, 11, 10.
   Wire each button between the digital pin and ground.

   Potentiometers should be connected to analog inputs A0 & A1 (ie pins 14 & 15).
   Pots should be wired to AGND and 3.3V (not Vin) with center wire to Analog pin.
*/

#include <Bounce.h>

Bounce button0 = Bounce(12, 10); // 10 = 10 ms debounce time
Bounce button1 = Bounce(11, 10);
Bounce button2 = Bounce(10, 10);

void setup() {
  //set read resolution to 12 bit for greater accuracy
  analogReadResolution(12);

  // Set pins to input - use A# system of designating analog pins so its not confusing
  pinMode(A0, INPUT_PULLUP);
  pinMode(A1, INPUT_PULLUP);
  pinMode(12, INPUT_PULLUP);
  pinMode(11, INPUT_PULLUP);
  pinMode(10, INPUT_PULLUP);
}

void loop() {
  // read analog inputs and set X-Y position
  Joystick.X(analogRead(A0));
  Joystick.Y(analogRead(A1));

  // read the digital inputs and set the buttons
  button0.update();
  button1.update();
  button2.update();

//button0 is connected to a maintained on/off switch. Didnt want signal from it to be continuos hence delay signal stopped.
// need to figure out a way so that the delay doesnt cause a stutter in other readings like the x & y axis
if (button0.fallingEdge()) {
    Joystick.button(1, 1);
    delay(200);
    Joystick.button(1, 0);
  }
if (button1.fallingEdge()) {
    Joystick.button(2, 1);
  }
if (button2.fallingEdge()) {
    Joystick.button(3, 1);
  }

// when button0 is turned to the off postion this sends a different button command then when flicked to on position. this allows 2 commands from the one switch
if (button0.risingEdge()) {
    Joystick.button(4, 1);
    delay(200);
    Joystick.button(4, 0);
  }
if (button1.risingEdge()) {
    Joystick.button(2, 0);
  }
if (button2.risingEdge()) {
    Joystick.button(3, 0);
  }

  // a brief delay, so this runs 20 times per second
  // set to 5 for 200 times a second if desired
  delay(50);
}
Last edited:

