
You are using an out of date browser. It may not display this or other websites correctly.
You should upgrade or use an alternative browser.
You should upgrade or use an alternative browser.
MSGEQ7 hookup to Teensy 4.1
- Thread starter AJOlivas
- Start date
PaulStoffregen
Well-known member
MSGEQ7 is not commonly used with Teensy 4 (or Teensy 3) because these boards are plenty powerful enough to do far more sophisticated spectral analysis entirely with software. So there aren't a lot of MSGEQ7 examples with photos, because most people use the audio library for this sort of project.
We do have lots of info about how to do it without the MSGEQ7 chip. The main one is this tutorial.
https://www.pjrc.com/store/audio_tutorial_kit.html
Skip to page 24 in the PDF for the info about frequency analysis. Maybe skim pages 8-11 first for quick info about how the design tool works.
If you scroll down on that page, you can find a complete walk through video. If you get stuck with the tutorial or would rather watch it in action rather than read the PDF, the video demonstrates every part. Click through to YouTube and expand the video description for time index links to jump to every section within the video, which corresponds to the parts of that PDF tutorial.
The tutorials all use the audio shield to get the analog signals into Teensy. It provides the best quality. But if you don't need great quality (certainly the MSGEQ7 isn't wonderful) you could also use a ADC pin. Hopefully once you've got the idea of the design tool, you can find the ADC analog input info in the design tool and understand how to use the design tool to swap out the digital audio from the audio shield with the ADC analog input.
If your goal is ultimately to make a LED light show that responds to the spectrum of music or other sound, you might also click File > Examples > OctoWS2811 > SpectrumAnalyzer to get an idea of how Teensy can use software analysis to accomplish so much more than a MSGEQ7 could ever do!
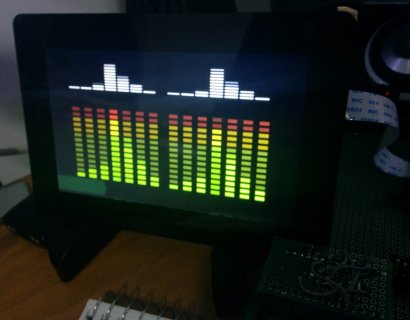
How small is this world! jejeje. I found a couple of those MSGEQ7 chips in DIP8 format. After reviewing many assemblies on the net, I found the most suitable circuit, consider 3 smd 104 capacitors, one of 33 pF, a 200K resistor and a 22K resistor.
Attachments

PaulStoffregen
Well-known member
Is it possible to use the octows2811 shield and the audio shield together?
Yes, but 4 of the pins conflict. There are 2 ways to use it anyway.
1: Use the pinlist feature to drive only 4 of the 8 pins and connect only 4 LED strips. In Arduino, click File > Examples > OctoWS2811 > Teensy4_PinList.
2: Solder wires to route any 4 of other pins not used by the audio shield, and then use the pinlist feature to output all 8 channels to the 8 pins which actually connect to the OctoWS2811 shield's inputs.