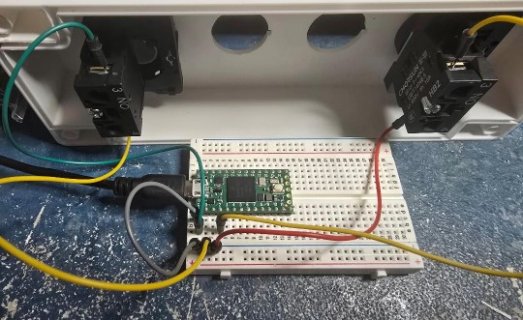
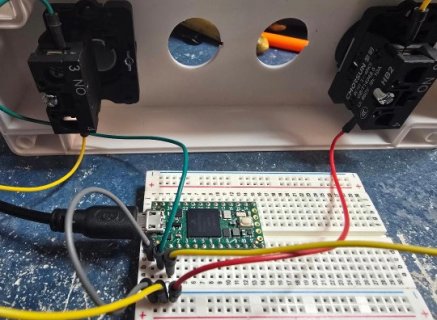
/* Buttons to USB MIDI Example
You must select MIDI from the "Tools > USB Type" menu
To view the raw MIDI data on Linux: aseqdump -p "Teensy MIDI"
This example code is in the public domain.
*/
#include <Bounce.h>
// the MIDI channel number to send messages
const int channel = 1;
// Create Bounce objects for each button. The Bounce object
// automatically deals with contact chatter or "bounce", and
// it makes detecting changes very simple.
Bounce button0 = Bounce(0, 5);
Bounce button1 = Bounce(1, 5); // 5 = 5 ms debounce time
Bounce button2 = Bounce(2, 5); // which is appropriate for good
Bounce button3 = Bounce(3, 5); // quality mechanical pushbuttons
Bounce button4 = Bounce(4, 5);
Bounce button5 = Bounce(5, 5); // if a button is too "sensitive"
Bounce button6 = Bounce(6, 5); // to rapid touch, you can
Bounce button7 = Bounce(7, 5); // increase this time.
Bounce button8 = Bounce(8, 5);
Bounce button9 = Bounce(9, 5);
Bounce button10 = Bounce(10, 5);
Bounce button11 = Bounce(11, 5);
void setup() {
// Configure the pins for input mode with pullup resistors.
// The pushbuttons connect from each pin to ground. When
// the button is pressed, the pin reads LOW because the button
// shorts it to ground. When released, the pin reads HIGH
// because the pullup resistor connects to +5 volts inside
// the chip. LOW for "on", and HIGH for "off" may seem
// backwards, but using the on-chip pullup resistors is very
// convenient. The scheme is called "active low", and it's
// very commonly used in electronics... so much that the chip
// has built-in pullup resistors!
pinMode(0, INPUT_PULLUP);
pinMode(1, INPUT_PULLUP);
pinMode(2, INPUT_PULLUP);
pinMode(3, INPUT_PULLUP);
pinMode(4, INPUT_PULLUP);
pinMode(5, INPUT_PULLUP);
pinMode(6, INPUT_PULLUP); // Teensy++ 2.0 LED, may need 1k resistor pullup
pinMode(7, INPUT_PULLUP);
pinMode(8, INPUT_PULLUP);
pinMode(9, INPUT_PULLUP);
pinMode(10, INPUT_PULLUP);
pinMode(11, INPUT_PULLUP); // Teensy 2.0 LED, may need 1k resistor pullup
}
void loop() {
// Update all the buttons. There should not be any long
// delays in loop(), so this runs repetitively at a rate
// faster than the buttons could be pressed and released.
button0.update();
button1.update();
button2.update();
button3.update();
button4.update();
button5.update();
button6.update();
button7.update();
button8.update();
button9.update();
button10.update();
button11.update();
// Check each button for "falling" edge.
// Send a MIDI Note On message when each button presses
// Update the Joystick buttons only upon changes.
// falling = high (not pressed - voltage from pullup resistor)
// to low (pressed - button connects pin to ground)
if (button0.fallingEdge()) {
usbMIDI.sendNoteOn(60, 99, channel); // 60 = C4
}
if (button1.fallingEdge()) {
usbMIDI.sendNoteOn(61, 99, channel); // 61 = C#4
}
if (button2.fallingEdge()) {
usbMIDI.sendNoteOn(62, 99, channel); // 62 = D4
}
if (button3.fallingEdge()) {
usbMIDI.sendNoteOn(63, 99, channel); // 63 = D#4
}
if (button4.fallingEdge()) {
usbMIDI.sendNoteOn(64, 99, channel); // 64 = E4
}
if (button5.fallingEdge()) {
usbMIDI.sendNoteOn(65, 99, channel); // 65 = F4
}
if (button6.fallingEdge()) {
usbMIDI.sendNoteOn(66, 99, channel); // 66 = F#4
}
if (button7.fallingEdge()) {
usbMIDI.sendNoteOn(67, 99, channel); // 67 = G4
}
if (button8.fallingEdge()) {
usbMIDI.sendNoteOn(68, 99, channel); // 68 = G#4
}
if (button9.fallingEdge()) {
usbMIDI.sendNoteOn(69, 99, channel); // 69 = A5
}
if (button10.fallingEdge()) {
usbMIDI.sendNoteOn(70, 99, channel); // 70 = A#5
}
if (button11.fallingEdge()) {
usbMIDI.sendNoteOn(71, 99, channel); // 71 = B5
}
// Check each button for "rising" edge
// Send a MIDI Note Off message when each button releases
// For many types of projects, you only care when the button
// is pressed and the release isn't needed.
// rising = low (pressed - button connects pin to ground)
// to high (not pressed - voltage from pullup resistor)
if (button0.risingEdge()) {
usbMIDI.sendNoteOff(60, 0, channel); // 60 = C4
}
if (button1.risingEdge()) {
usbMIDI.sendNoteOff(61, 0, channel); // 61 = C#4
}
if (button2.risingEdge()) {
usbMIDI.sendNoteOff(62, 0, channel); // 62 = D4
}
if (button3.risingEdge()) {
usbMIDI.sendNoteOff(63, 0, channel); // 63 = D#4
}
if (button4.risingEdge()) {
usbMIDI.sendNoteOff(64, 0, channel); // 64 = E4
}
if (button5.risingEdge()) {
usbMIDI.sendNoteOff(65, 0, channel); // 65 = F4
}
if (button6.risingEdge()) {
usbMIDI.sendNoteOff(66, 0, channel); // 66 = F#4
}
if (button7.risingEdge()) {
usbMIDI.sendNoteOff(67, 0, channel); // 67 = G4
}
if (button8.risingEdge()) {
usbMIDI.sendNoteOff(68, 0, channel); // 68 = G#4
}
if (button9.risingEdge()) {
usbMIDI.sendNoteOff(69, 0, channel); // 69 = A5
}
if (button10.risingEdge()) {
usbMIDI.sendNoteOff(70, 0, channel); // 70 = A#5
}
if (button11.risingEdge()) {
usbMIDI.sendNoteOff(71, 0, channel); // 71 = B5
}
// MIDI Controllers should discard incoming MIDI messages.
// http://forum.pjrc.com/threads/24179-Teensy-3-Ableton-Analog-CC-causes-midi-crash
while (usbMIDI.read()) {
// ignore incoming messages
}
}


